

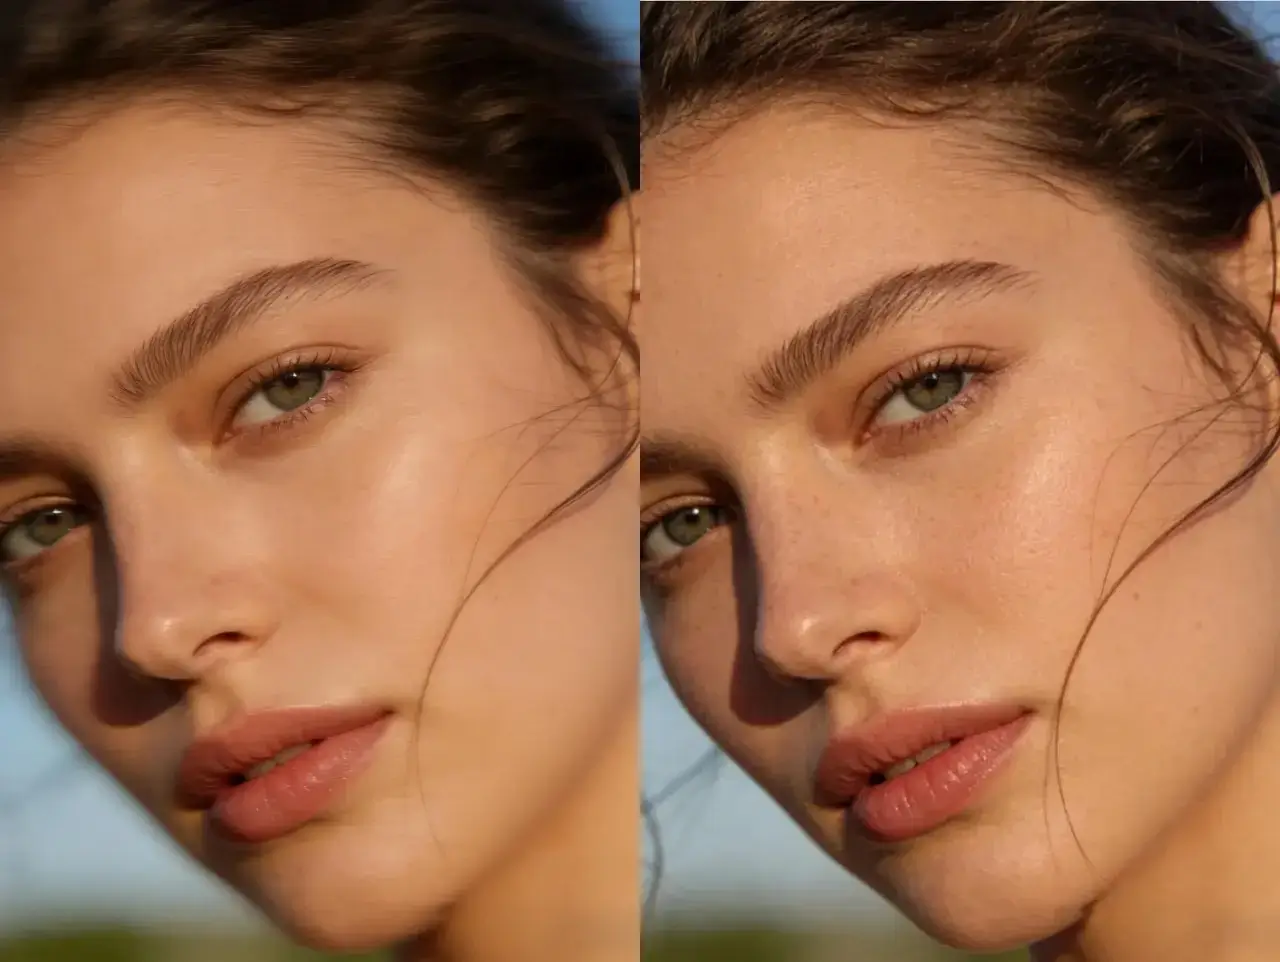
You just took a photo that looks perfect on your small camera screen. You get home, open it on your computer, and realize the focus is soft. The edges are fuzzy and the details look like a smudge. This is a common problem that every photographer faces. You have two main ways to fix this mess. You can use a dedicated Photo Enhancer to handle the work in a few seconds. This path is fast and does not require you to learn any complex tools.
If you want more control over the final look, you might look for a Free Photo Editor to help you clean up the image. These tools give you the power to adjust the sharpness without spending a lot of money. However, the real battle is between the speed of artificial intelligence and the manual precision of Adobe Photoshop. One promises a result in one click, while the other requires thirty minutes of careful work. We will look at which method gives you the best results for your blurry pictures.
1-Click AI Photo Enhancer Overview
The AI photo enhancer is a new kind of tool that uses machine learning to fix images. It does not just push pixels around like old software did. Instead, it looks at your photo and compares it to millions of high quality images it has seen before. When it sees a blurry eye or a fuzzy tree branch, it knows what those things should look like. It then redraws those details to make them sharp again. This process happens almost instantly. You upload your file, click one button, and the software does the rest.
These tools are built for people who do not have time to sit at a desk for hours. They are perfect for social media users, small business owners, and hobbyists. You do not need to know what a radius or a threshold is. The software makes those choices for you based on the specific needs of your photo. It is a hands off approach that focuses on getting you a clean result as fast as possible.
Key Features of AI Enhancers
The main feature of these tools is automated sharpening. The AI identifies the difference between intentional background blur and accidental camera shake. It targets the parts of the image that need help while leaving the rest alone. This prevents the entire photo from looking crunchy or over processed.
Another big feature is noise reduction. Blurry photos often have a lot of grain, especially if they were taken in low light. The AI can smooth out this grain without losing the texture of skin or clothing. Many of these tools also include face restoration. If a person’s face is out of focus, the AI can reconstruct their features to make them look clear and recognizable again.
Pros and Cons of AI Enhancers
Pros:
The biggest advantage is speed. You can fix a photo in less than ten seconds. There is no learning curve, so anyone can use it right away. Most AI tools are also very good at upscaling, which means they can make a small, blurry photo larger and clearer at the same time.
Cons:
The main drawback is the lack of control. If the AI makes a mistake, you cannot easily tell it to fix just one specific spot. Sometimes the AI can make a face look a bit too smooth, which can feel unnatural. You are relying entirely on the algorithm to make the right choices for your art.
Best For
This tool is best for people who have a large batch of photos to fix. If you have a hundred photos from a wedding or a vacation that are slightly soft, you can run them through an AI enhancer in minutes. It is also the best choice for beginners who find professional software too intimidating.
Adobe Photoshop Overview
Adobe Photoshop has been the industry standard for decades. It is a massive program with thousands of tools. When you use Photoshop to fix a blurry picture, you are doing the work yourself. You are not letting a computer guess what the photo should look like. You are using filters, layers, and masks to pull out the hidden detail. This process is much slower than using AI. It often takes twenty to thirty minutes to get a single photo looking perfect.
Photoshop gives you total authority over every single pixel. You can choose exactly how much sharpening to apply to the eyes versus the hair. You can use different techniques for different types of blur. If the camera moved during the shot, you use one tool. If the lens was just out of focus, you use another. It is a professional workflow that requires a lot of patience and practice.
Key Features of Photoshop
Photoshop offers tools like Smart Sharpen and Shake Reduction. Smart Sharpen allows you to control the amount and the radius of the effect. This means you can decide how wide the sharpening edges should be. The Shake Reduction filter is even more advanced. It analyzes the path of the camera movement and tries to reverse it.
The use of layers and masks is the most important feature here. You can apply a sharpening filter to a new layer and then paint it only onto the areas that need it. This keeps the background soft while making the subject crisp. You also have access to the High Pass filter, which is a classic way to add grit and detail to a flat image.
Pros and Cons of Photoshop
Pros:
You have complete control over the output. You can fine tune the settings until the photo looks exactly how you want it. The results are often more natural than AI because you are not adding new data, you are just enhancing what is already there. It is a non destructive process, so you can always go back and change your mind.
Cons:
The learning curve is very steep. It takes months or even years to master all the sharpening techniques. It is also expensive, as you have to pay a monthly subscription fee. The time investment is the biggest hurdle. Spending thirty minutes on one photo is not practical for most people.
Best For
Photoshop is best for professional photographers and editors who are working on high stakes projects. If you are printing a large poster or working on a commercial advertisement, you need the precision that only Photoshop provides. It is also the best choice for complex restorations where a photo is badly damaged.
Side by Side Comparison Summary
When we look at these two methods, we see a clear trade between time and control. The AI tool is built for efficiency. Photoshop is built for perfection.
|
Category |
AI Photo Enhancer |
Adobe Photoshop |
| Time Spent | 5 to 10 Seconds | 20 to 30 Minutes |
| Difficulty | Very Easy | Very Hard |
| User Control | Minimal | Total |
| Result Style | Reconstructed | Enhanced Original |
| Cost | Low or Pay Per Use | Monthly Subscription |
| Batch Editing | Automatic | Manual or Actions |
The AI tool wins on speed every time. It can process a photo before you even finish opening Photoshop. However, Photoshop wins on flexibility. In Photoshop, you can fix a blurry eye without affecting the skin texture around it. The AI might smooth the skin too much while trying to fix the eye.
Final Recommendation
If you are a casual user who wants to save a blurry memory, the AI Photo Enhancer is the clear winner. It is fast, easy, and the results are usually great for digital viewing. You do not need to spend hours watching tutorials to get a good result. It handles the difficult math for you so you can get back to sharing your photos.
If you are a professional or a student who wants to learn the craft of editing, you should stick with Photoshop. The manual process teaches you how light and focus work. While it takes much longer, the level of detail you can achieve is still the gold standard for print media. For most people, the thirty minutes saved by using AI is worth more than the tiny bit of extra precision Photoshop offers. Choose the tool that fits your schedule and your skill level.
Editor’s Note: The opinions expressed here by the authors are their own, not those of impakter.com — Cover Photo Credit: Pexels